
This post contains affiliate links.

In the world of balloon decorating, where creativity and craftsmanship converge to bring joyous moments to life, the significance of showcasing your work through captivating imagery cannot be overstated. A picture, as the adage goes, speaks a thousand words, and in the case of a balloon decorating business, those words translate into potential clients, memorable events, and a thriving enterprise.
To photograph party balloons, ensure good lighting, and use a wide aperture for a shallow depth of field. If the balloons are moving use autofocus and a faster shutter speed, not necessarily the fastest shutter speed.
In this article, we delve into the compelling reasons why excellent photography of your balloon creations is not just a luxury but an essential tool for success in this vibrant industry. Discover how a well-crafted image can transform your balloon decorating business into a visual spectacle that attracts, amazes, and ultimately, prospers.
Launching into the realm of balloon photography goes beyond capturing simple images. It calls for a deep understanding of camera operations, the manipulation of light, and the play of composition. To truly bring life to your photographs, it’s essential to grasp camera basics such as the role of aperture, shutter speed, ISO, and exposure.
Get to know the various camera types and the corresponding accessories that can aid in transforming your balloon photography. Understanding the nuances of lighting and composition will help you display the magnificent visuals that balloons can offer. Consider how to leverage natural light to accentuate your subjects and master the craft of framing balloons according to their settings.
Understanding Camera Basics – Photograph Party Balloons
Understanding Camera Basics For Photographing Balloons
Before you start photographing party balloons, it’s important to grasp the fundamentals of camera operation. Key settings such as aperture, shutter speed, ISO, and exposure play significant roles in your photo’s final look.
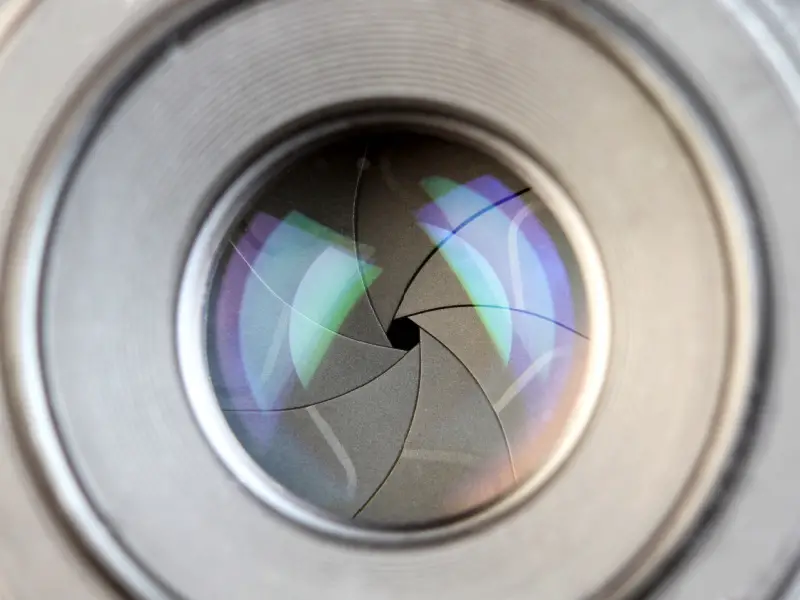
The aperture works like the pupil of a human eye, it dictates how much light enters the camera. When photographing balloons, an aperture of around f/8 or f/11 will secure most of the balloons and the background in focus. If you want to isolate a particular balloon from the background or create a bokeh effect, you could lower the f-stop to around f/2.8 or even lower.
Shutter speed refers to the length of time the camera sensor is exposed to light. A faster shutter speed freezes motion while a slower one creates motion blur. For balloon photography, if you want to freeze the balloon’s movement, you might need a faster shutter speed like 1/200s or 1/500s. If you want to convey movement, particularly for hot air balloons, a slower shutter speed like 1/30s will show a sense of movement.
ISO settings adjust the camera’s sensitivity to light. Low ISO settings are typically used in brighter conditions to reduce sensitivity. Higher ISO levels are for darker conditions and increase the sensor’s sensitivity to light. For balloon photography, depending on the lighting condition, you may need to adjust your ISO. For instance, on bright days, an ISO of 100 or 200 would usually suffice. In cloudy or dimmer conditions, consider increasing the ISO.
Exposure is the brightness of the photo. A correctly exposed shot will have clear details in both the highlights (bright areas) and the shadows (dark areas). You might need to adjust your exposure depending on the light conditions and the balloons’ color. Remember, brighter colors reflect more light and may force you to reduce exposure.
Camera Types And Accessories Beneficial For Photographing Party Balloons
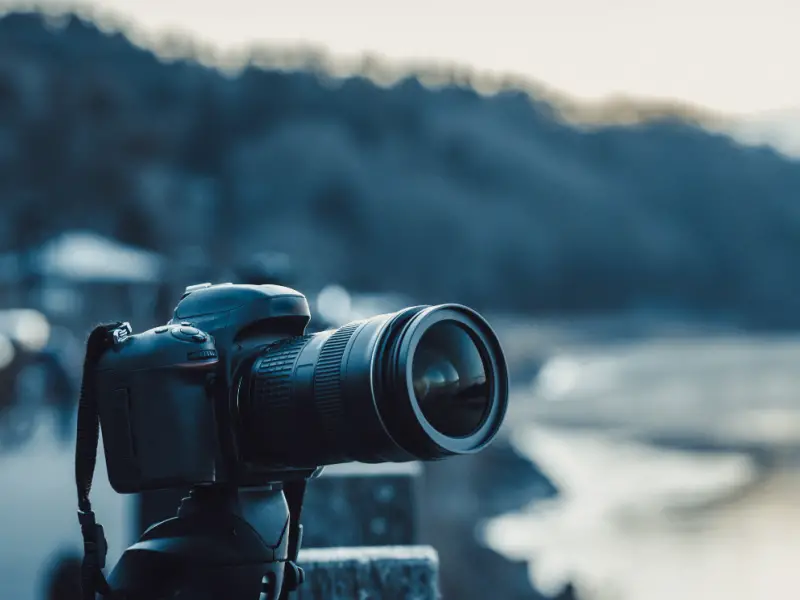
Different types of cameras cater to varying photography needs. DSLRs (Digital Single Lens Reflex) and mirrorless cameras are popular choices due to their superior image quality, speed, and adaptability. They also allow for interchangeable lenses, providing flexibility to shoot according to your requirements. For example, a wide-angle lens would be helpful to capture a group of balloons, whereas a telephoto lens can focus on catching the details of a single balloon.
Compact cameras, also known as point and shoot cameras, are both handy and easy to use, making them suitable for casual balloon shoots.
Lastly, a sturdy tripod can prove to be beneficial, especially in low light conditions or when capturing time-lapses of the balloon flight. A good quality camera bag could protect your gear during outdoor photography events such as a balloon fiesta.
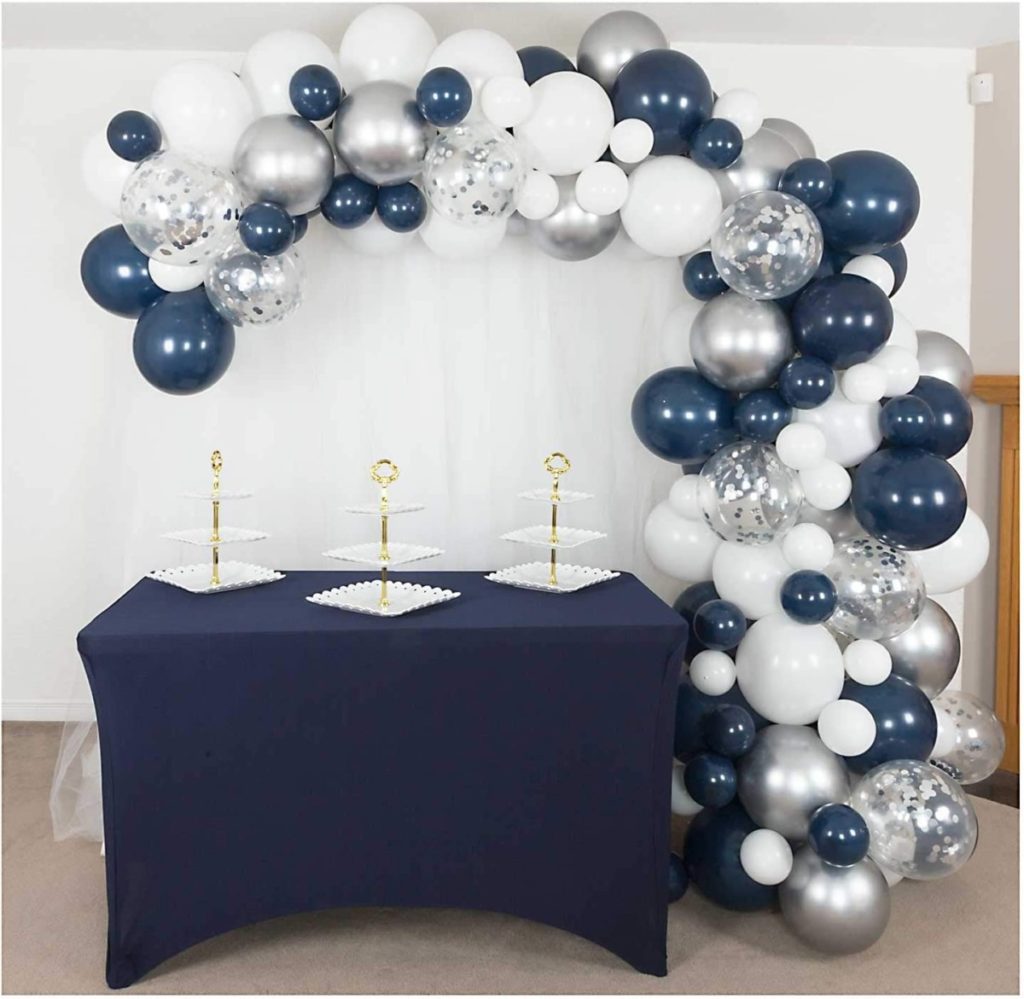
Shimmer and Confetti balloon garland kit
Lighting And Composition – Photograph Party Balloons
Understanding Lighting In Balloon Photography
Lighting is a crucial element in any form of photography, including when photographing balloons. Natural lighting, such as sunlight, is highly preferred due to its ability to give balloons a beautiful glow. To effectively capture the enchanting colors of balloons, choose the hours after sunrise and before sunset. This period, known as golden hours, provides warm, diffused light that softens the image and reduces harsh shadows. When shooting during the mid-day, try to use a fill-flash to counterbalance the strong direct light overhead. Always keep in mind to shoot with the sun behind you unless you are purposely aiming for a silhouette effect.
Maximizing Natural Light
Nature has a way of providing stunning backdrops and complimentary lighting for your balloon photos. Cloudy days allow for softer lighting, which can evenly illuminate your balloon. You can use sunlight as backlighting by having the sun behind the balloon to create a glow effect around it. Remember to adjust your camera settings to prevent underexposing the balloon, which can occur because of the strong light from the sun.
Framing And Composition In Balloon Photography
The composition is another aspect that can make or break your balloon photos. The “rule of thirds” is the most popular method, in which you divide your frame into a 3×3 grid and position your balloon along these lines or their intersections. This method balances your photo, giving it a pleasing aesthetic.
Using Different Environments
Different environments offer diverse compositional choices. For instance, if you’re in a busy city setting, you might choose to use buildings or people as scale references for the massive size of the balloons. In a more natural or rural setting, you can use trees, mountains, or fields as your frame. Displaying balloons against a clear, azure sky can also provide stunning images.
Adding In Elements
Adding elements such as people, landscape aspects, or other objects into your frame not only adds context but also highlights the size or color contrast of the balloon. Playing with elements can create a dynamic perspective by giving the viewer a sense of dimension and distance.
In summary, balloon photography can be a fun and rewarding activity. By understanding and applying proper lighting techniques, you can capture the stunning colors of balloons. The right composition and environment can complement the subject and create visually appealing photos. Balloon photography is all about creativity, experimentation, and, most importantly, enjoying the process.
What Camera Settings To Use
Here are some general setting guidelines for creating beautiful photos of your balloon art.
| Photography Scenario | Camera Settings |
|---|---|
| Indoor with Natural Lighting | – ISO: 100-400 (lower ISO for less noise) |
| – Aperture: f/2.8 – f/5.6 (for a shallow depth of field) | |
| – Shutter Speed: 1/100 – 1/400 (to freeze motion) | |
| Indoor with Limited Lighting | – ISO: 800-3200 (higher ISO to compensate for low light) |
| – Aperture: f/1.8 – f/2.8 (to let in more light) | |
| – Shutter Speed: 1/50 – 1/200 (slow shutter for more light) | |
| Outdoor | – ISO: 100-200 (low ISO for optimal image quality) |
| – Aperture: f/5.6 – f/11 (for a wider depth of field) | |
| – Shutter Speed: 1/200 – 1/800 (to capture fast-moving balloons) | |
| Nighttime Outdoor (with balloons) | – ISO: 800-3200 (higher ISO for low light) |
| – Aperture: f/2.8 – f/5.6 (wider aperture for more light) | |
| – Shutter Speed: 1/50 – 1/200 (slow shutter for more light) |
Remember, these settings are general guidelines and may vary depending on your specific camera, lens, and the unique lighting conditions of your balloon photography environment. Adjustments may be necessary to achieve the desired results.
Post Processing Techniques
Importance Of Post Processing In Balloon Photography
Photographing balloons involves more than just capturing the shot. It also requires refining and editing the image to enhance its overall quality and appeal. The processes of post-processing, which include color correction, sharpening, and cropping, are integral components of creating compelling balloon photography. This is where mastering software like Adobe Photoshop and Lightroom becomes crucial.
Understanding Adobe Photoshop For Balloon Photography
Adobe Photoshop is a powerful tool that can transform your balloon images from simple shots into captivating works of art. To make the most of Photoshop, you must familiarize yourself with its basic tools, like brightness and contrast adjustment, sharpening, and color improvement. For balloon photography, special attention should be given to enhancing the colors of the balloons and removing any unwanted elements from the background.
Mastering Color Enhancement In Adobe Photoshop
Color enhancement is crucial in balloon photography, as balloons are often associated with bright, vibrant colors. In Adobe Photoshop, you can use adjustment layers to modify colors. Go to the Layer menu, select New Adjustment Layer, and then choose Hue/Saturation. This allows you to adjust the hue, saturation, and lightness sliders until you achieve the desired color intensities in your balloon photo.
Sharpening Images In Adobe Photoshop
Sharpening is another essential technique in post-processing. It is the act of increasing contrast along the edges within a photo to create a sense of depth and detail. In Photoshop, you can use the Unsharp Mask or the Smart Sharpen tool to achieve this. Apply these tools sparingly, as too much sharpening can make the image seem unnatural.
Getting Started With Adobe Lightroom For Balloon Photography
Adobe Lightroom is another excellent tool for editing and organizing your balloon photographs. Its cataloging capabilities allow you to easily locate your images, while its editing functions are usually more intuitive and streamlined compared to Photoshop.
Enhancing The Focus In Adobe Lightroom
In Adobe Lightroom, you can enhance the focus of your balloon photos by adjusting the Clarity and Sharpness sliders found under the Develop module’s Detail panel. Sliding the Clarity slider to the right will add contrast to the midtones, making the image appear more detailed. Increasing the Sharpness will define the edges of the balloons, making them stand out against the background.
Adjusting Overall Appearance In Adobe Lightroom
To enhance the overall appearance of your balloon photographs in Lightroom, you may need to adjust exposure, contrast, and saturation. These settings are found in the Basic panel under the Develop module. Subtle adjustments can significantly improve your image, making the balloons appear more vibrant and the scene more compelling.
Remember, the goal of post-processing is to enhance the image, not to distort reality. Try to retain the authenticity of the photo while playing with colors and sharpening to present the balloons in their best light.
To truly make your balloon photography stand out, gaining proficiency in post-processing techniques becomes pivotal. It empowers you to breathe life into your raw photos, enriching their appeal considerably. From sharpening the focus to adjusting color saturation, mastering editing software like Adobe Photoshop and Lightroom can help reveal the true potential of your balloon images. As you keep exploring and evolving your photography techniques, you’ll notice that every balloon brings a new story, a distinct perspective, and a unique canvas that only you can render to your audience. Here’s to capturing the floating poetry of balloons!
For more information about creating a balloon portfolio, check out my post, All About A Balloon Business Portfolio.
I hope this post brought value to your day. If it did, please consider sharing it with a friend or on your favorite social media. Thanks For Reading Fun With Balloons!