
This post contains affiliate links.
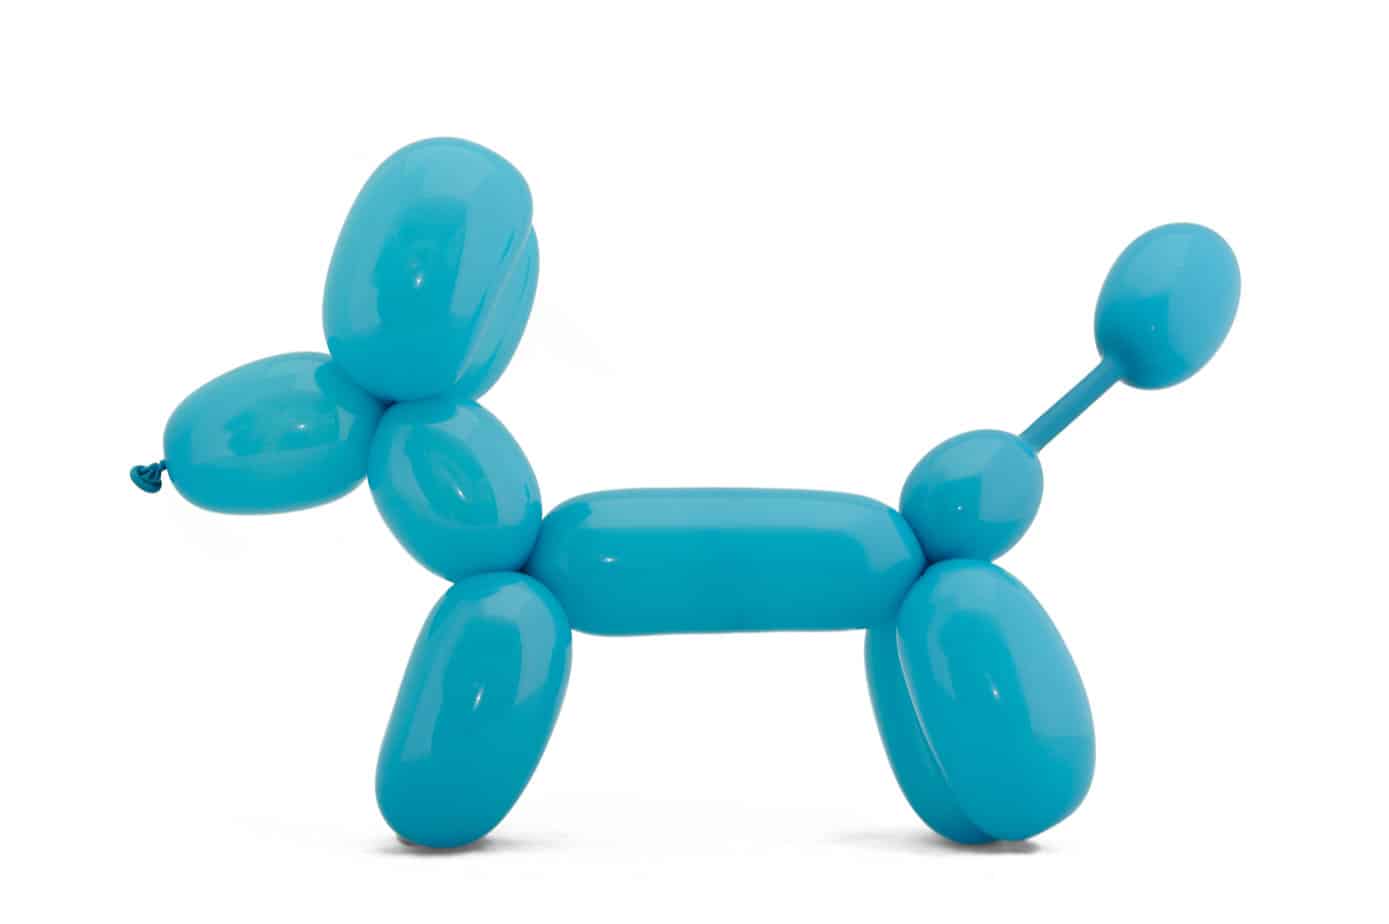

The art of balloon twisting has long captured the hearts and imaginations of people, young and old. Among the myriad of creations that can be crafted from a simple balloon, the iconic balloon dog holds a special place. A staple at parties, carnivals, and events, the balloon dog never fails to bring a smile to people’s faces.
To twist a balloon dog like a pro, one must master basic balloon twisting techniques, beginning with the head and carefully shaping the body and legs. Attention to proportions and symmetry is key, followed by meticulous tail and detail work.
If you’ve ever marveled at a skillfully crafted balloon dog and wondered how it’s done, you’ve come to the right place. In this guide, we will unravel the secrets behind mastering the art of twisting a balloon dog, transforming a seemingly ordinary balloon into a delightful creation that can enchant any audience.

What Is A Balloon Dog
A balloon dog is a famous sculpture made from long, flexible balloons. Typically created by twisting and manipulating the balloon, it resembles a stylized dog featuring a long body, four legs, a head, and a tail, often seen at various events and celebrations for entertainment.
What Balloons Are Used To Twist A Balloon Dog
Balloon dogs are commonly crafted using long, thin, and flexible latex balloons designed explicitly for balloon twisting, ensuring easy manipulation and shaping to create a distinctive canine form. These are called entertainer balloons, modeling balloons, 160 balloons, or 260 balloons.
For more information about the different types of balloons, check out the post, Types Of Balloons – Everything You Need To Know And More.


Steps To Twisting A Balloon Dog
Before embarking on your balloon-twisting journey, it’s crucial to have the right supplies at hand. You’ll need high-quality, sturdy balloons explicitly designed for twisting, as they are more flexible and less likely to burst. Additionally, ensure you have a reliable hand pump to inflate the balloons to the desired size. Keeping a pair of scissors nearby can also come in handy during the twisting process.
What You Will Need:
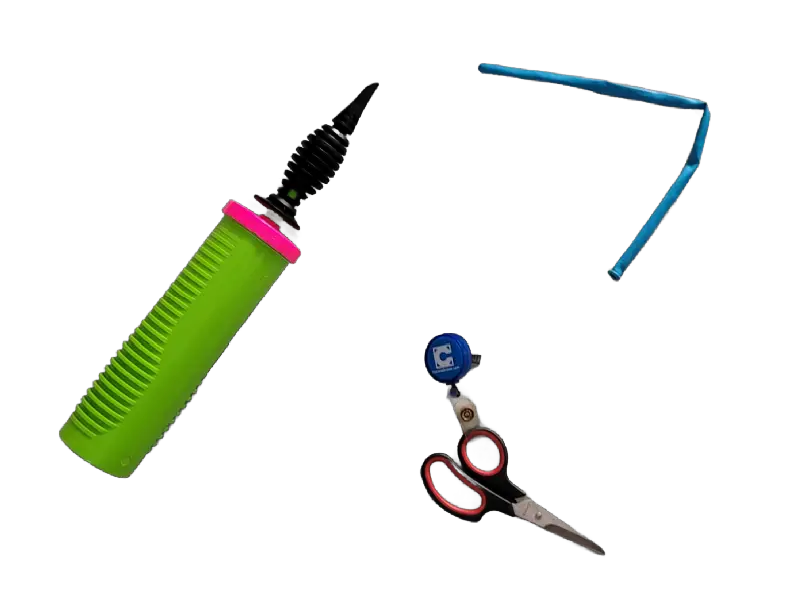
- 260 Balloon
- Balloon Hand Pump
- Scissors (optional)
Master The Basic Balloon Twisting Techniques
Balloon twisting, like any other art form, requires practice and patience. Familiarize yourself with fundamental twisting techniques such as the elemental twist, the lock twist, and the loop twist. These techniques form the foundation for creating various shapes and designs, including the classic balloon dog.
Inflate The Balloon
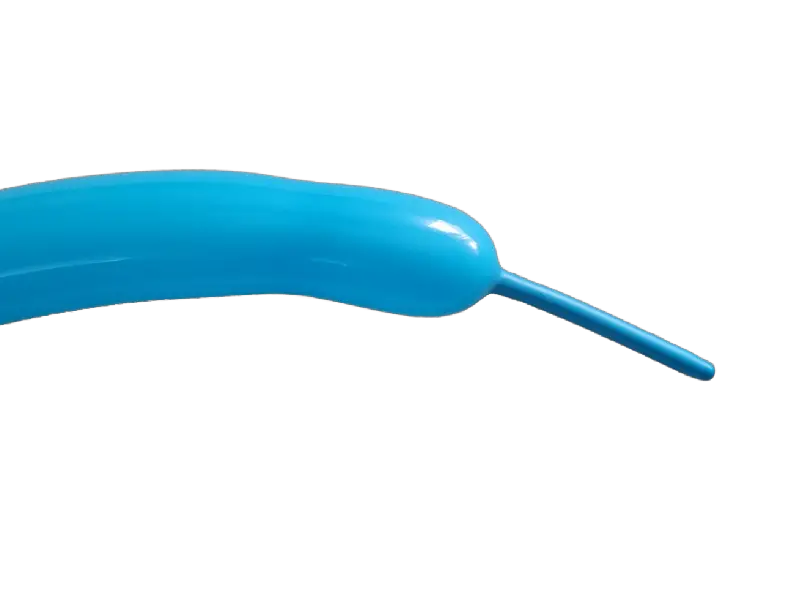
To start crafting the balloon dog, inflate a balloon, leaving some space at the end for the tail, about 2″-3″. If using the Qualatex hand pump, it’s 2-1/2 pumps, and then soften the balloon by letting air out until you have about 2″-3″ of tail at the end.
Tie the balloon. If you need more information about how to tie a balloon, check out my post, Learn To Tie A Balloon Like A Expert.
Twist Three Bubbles
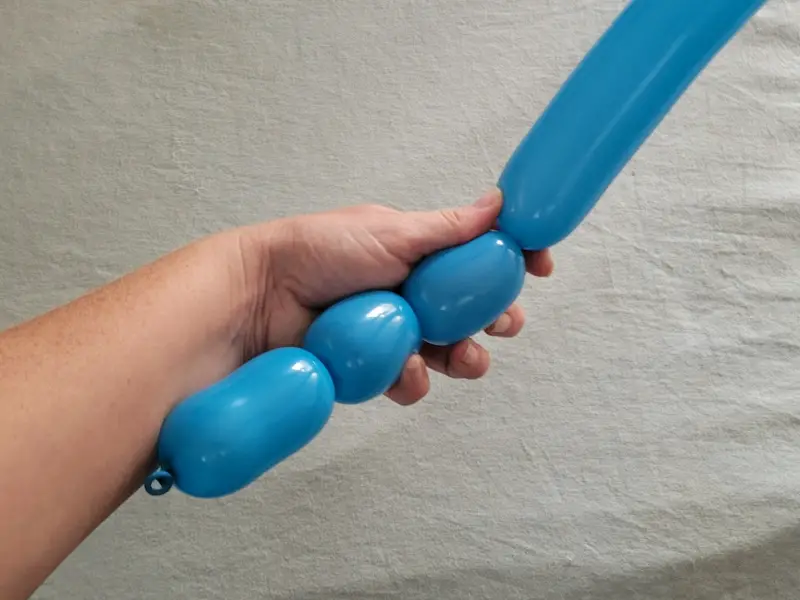
Starting at the end with the knot, twist three bubbles. The first bubble should be about 2″ long, and the second and third bubbles should be about 1″ long, depending on the dog you are making. You can adjust the sizes of the bubbles to make different dog shapes.
Form The Dogs Nose And Ears
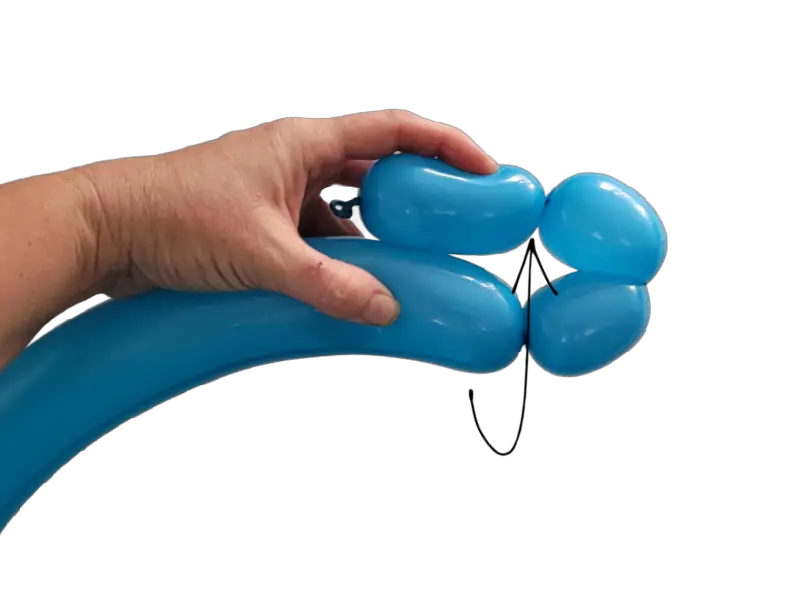
The first bubble will become the dog’s nose, and the second and third bubbles will become the dog’s ears. In this step, we will twist to form the dog’s head.
Fold the balloon bubbles so the first bubble is lined up with the rest of the balloon, and the second and third bubbles are next to each other.
Twist the second and third balloon bubbles together.
Your balloon should now look like the head of a dog.
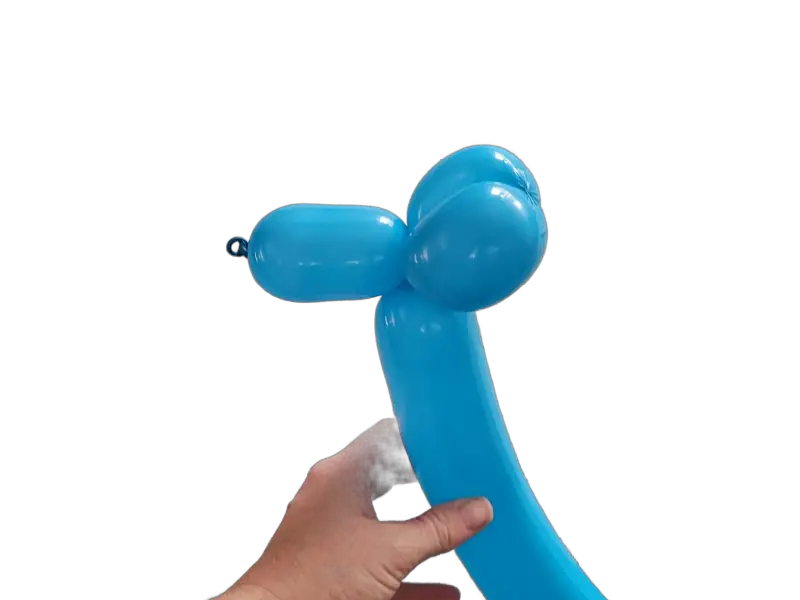
Form The Dog’s Body And Front Legs
Continuing from the head, twisting three medium-sized bubbles (about 3″) for the neck and the two front legs. Secure the twists to ensure they hold their shape.
Fold the neck bubble so it lays flat against the remainder of the balloon, and twist the front legs to each other.
Your balloon dog should now look like the front half of a dog.
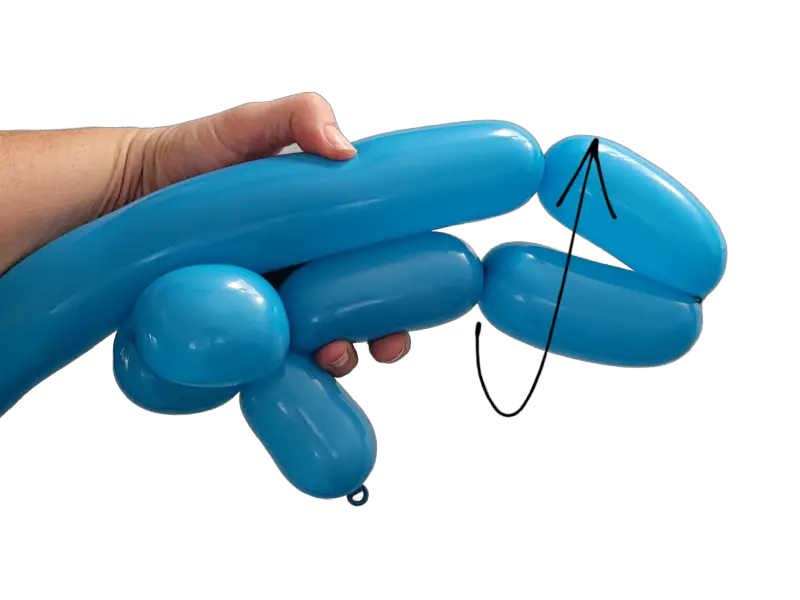
Form The Tail And Back Legs
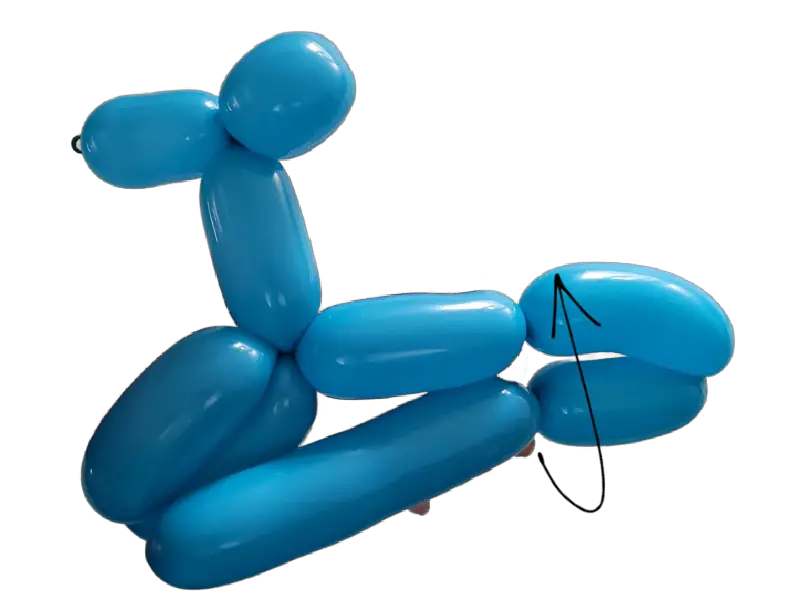
Twist three more bubbles, about 3″ long. The first bubble will become the dog’s body, and the second and third bubbles will become the back legs.
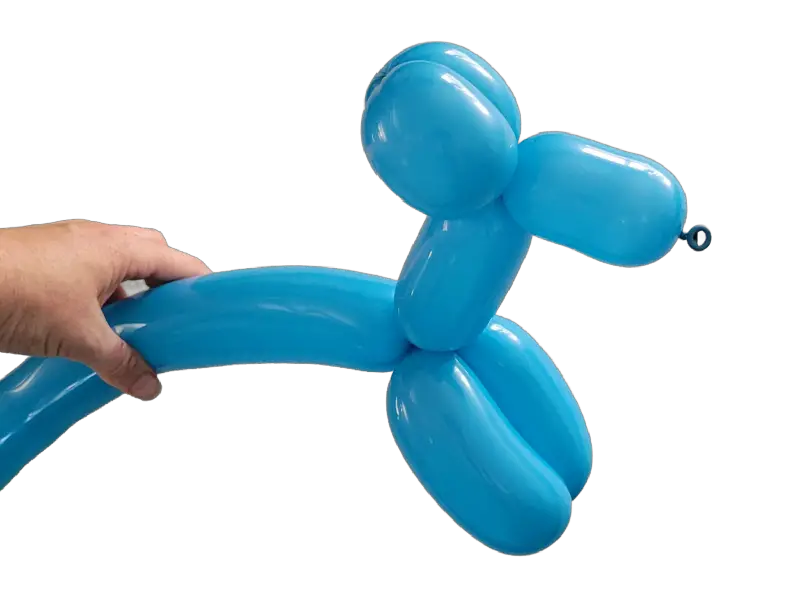
Adjust And Personalize
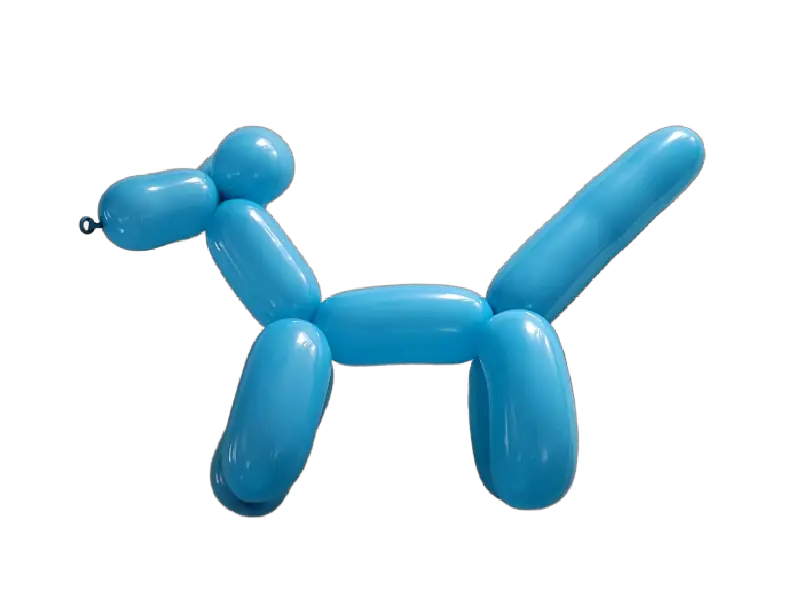
Adjust the balloon dog so the legs are pointing down, the ears are pointing up, and the tail is pointing up.
You may also want to draw on a face with a marker or add any other personal touches.
Enjoy!
Tips And Variations For The Balloon Dog
Tips
- When twisting the bubbles, always twist them in the same direction, holding the first bubble and the last bubble will ensure the bubbles don’t come undone while you are working.
Dog Variations
- Adjust the ear lengths to create smaller or longer ear sections for different kinds of dogs.
- Adjust the tail length to create a smaller or longer tail.
- Adjust the body length to create a longer body section to make a dachshund.
Other Animals
- Adjust the leg lengths to create a horse.
- Use a yellow balloon and adjust the length of the neck section to create a giraffe.
The History Of The Balloon Dog
The history of the balloon dog, a beloved and iconic creation in the world of balloon art, traces back to the early 20th century when the art of balloon twisting began to gain popularity. However, the specific origins of the balloon dog remain somewhat ambiguous. Balloon twisting is thought to have emerged from the tradition of making animal shapes from balloons at carnivals and circuses, often as entertainment for children and spectators. The balloon dog, with its playful and recognizable form, gradually became a staple in this repertoire.
It wasn’t until the latter half of the 20th century that the balloon dog started to gain widespread recognition, primarily due to the efforts of professional entertainers and balloon artists who popularized the craft through stage performances and public events. The surge of interest in balloon twisting as entertainment further propelled the balloon dog into the spotlight, solidifying its status as a classic and endearing balloon sculpture.
The balloon dog’s enduring appeal can be attributed to its whimsical and accessible nature, appealing to people of all ages. Its simple yet charming design has made it a standard feature at various festivities, including birthday parties, festivals, and art exhibitions. Furthermore, contemporary artists have also incorporated the balloon dog into their work, using it as a symbol of playful nostalgia and a representation of the crossover between popular culture and art. As a result, the balloon dog continues to hold a special place in the hearts of many, serving as a testament to the joy and wonder that can be derived from the simplest of creations.
Twisting a balloon dog may seem simple, but it requires dedication and practice to perfect the craft. Following these steps and continuously honing your skills, you can become a master balloon twister, delighting audiences with your intricate and whimsical creations. Remember, the key to mastering the art lies in patience, creativity, and a genuine passion for bringing joy to others through the simple yet magical world of balloon sculpting. So grab your balloons and pump, and let your imagination soar as you embark on your balloon-twisting adventure!
I hope this post brought value to your day. If it did, please consider sharing it with a friend or on your favorite social media. Thanks For Reading Fun With Balloons!