
This post contains affiliate links.

What Is A Balloon Ceiling
Have you ever seen a ceiling covered in balloons? A balloon ceiling (or ceiling balloons) is a collection of balloons on the ceiling. These can be called a ceiling balloon or a balloon ceiling, the terms are interchangeable. There are two different methods to achieve the ceiling balloon look. In this post, I’m going to show you how to make both types of balloon ceilings.
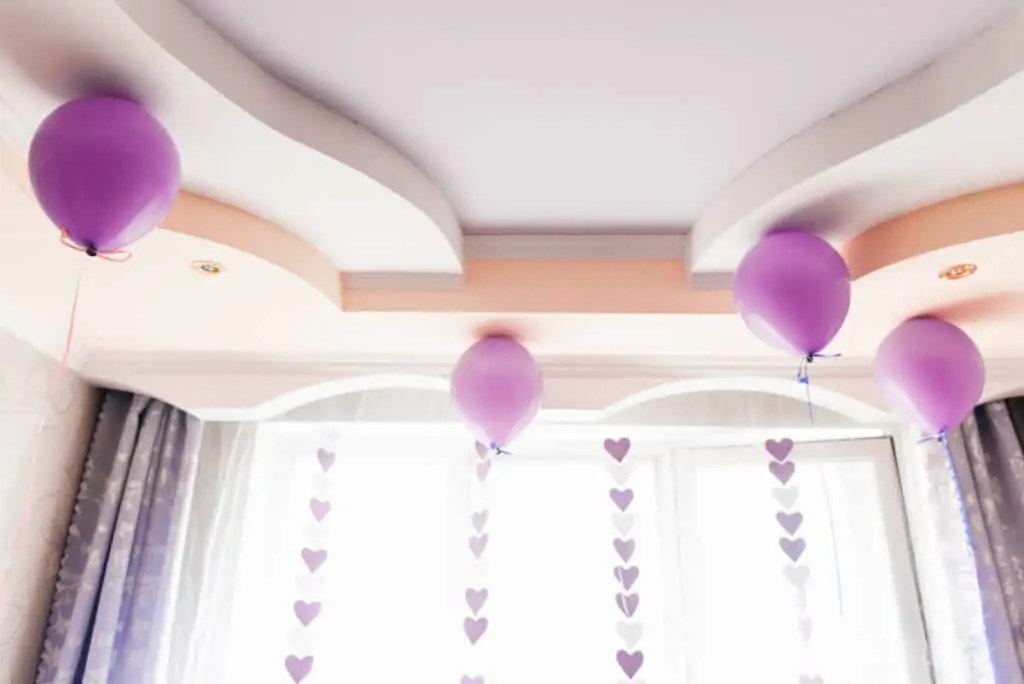
Balloon ceilings can have just a few balloons to accent a specific space or just to add a little bit of color.

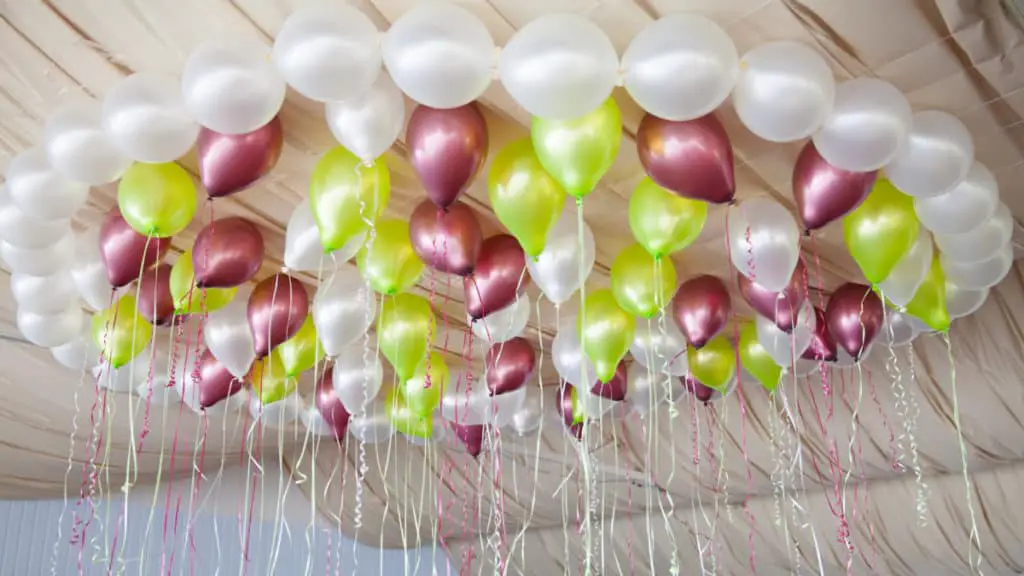
Or balloon ceilings can have a ton of balloons that cover the whole ceiling transforming the entire space.
Balloons can be corraled on the ceiling to a specific location or they can be left to float where ever they float (if using helium).
Helium Balloon Ceiling Method
The first and most common way to make a balloon ceiling is using helium. Helium can be used to create a ceiling full of balloons.
Check out below for steps on how to create a helium balloon ceiling.
Air Filled Balloon Ceiling Method
With the continued rising cost of helium, balloon professionals and DIYers have looked for alternative ways to create beautiful balloon ceilings. Air filled balloon ceilings are an excellent alternative to helium filled balloon ceilings.
Check out below for steps on how to create an air filled balloon ceiling.
Steps To Make A Balloon Ceiling – Helium
- Gather All Of Your Ingredients
- Treat Balloons With Hi-Float (Optional)
- Inflate Balloon & Tie
- Attach Ribbon (Optional)
- Place Balloon
- Repeat
- Enjoy!
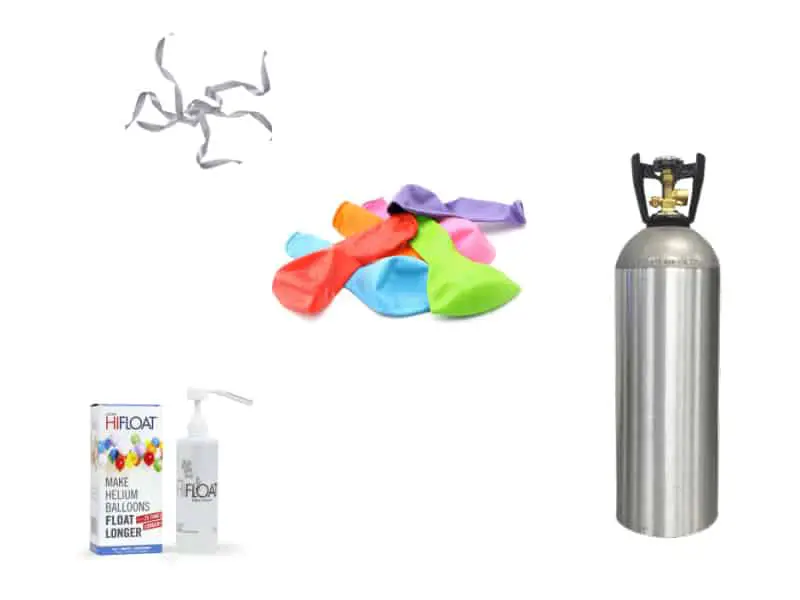
1. Gather All Of Your Ingredients
- Balloons
- Hi-Float (Optional)
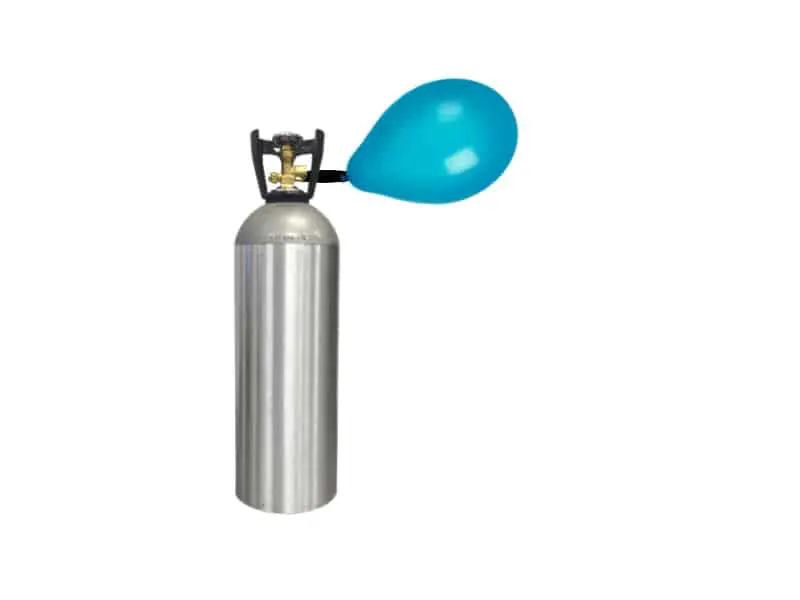
- *Helium
- Ribbon (Optional)
*Check out my post The Best Helium Tanks.
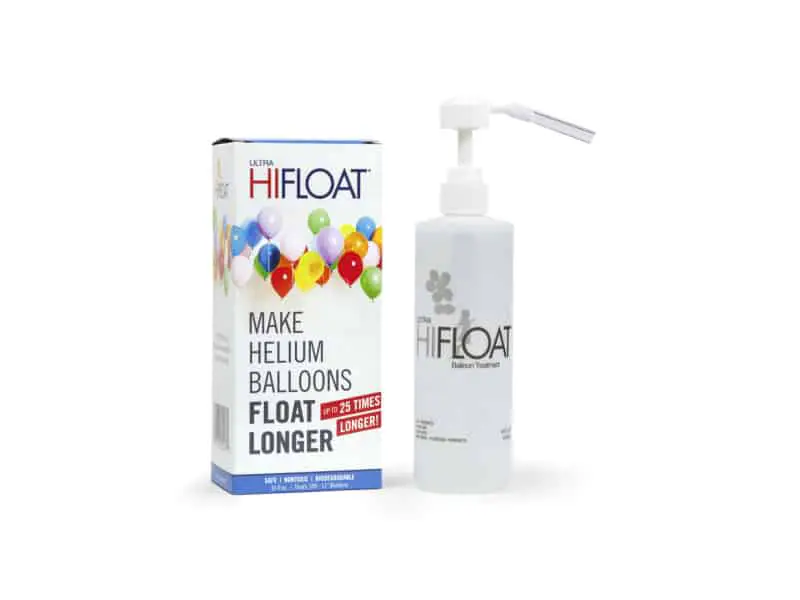
2. Treat Balloons With Hi-Float (Optional)
This is an optional step but a worthwhile one in my opinion. Ultra Hi-Float is a product that treats the inside of balloons, extending their life significantly. You can pick up some Hi-Float for yourself here on Amazon.
As a side note, I have found it helpful especially in balloon ceilings to use slightly less Hi-Float than the manufacturer’s recommendations. For a standard 11″ balloon, I only use about the size of a pea. And make sure to mix it around the whole balloon.
3. Inflate Balloon & Tie
Inflate your balloons with helium. You may want to size your balloons when making a balloon ceiling. I like to use the eyeball method to size my balloons for a balloon ceiling. Check out my post How To Size A Balloon.
Do NOT overinflate your balloons, this may cause the balloon not to sit correctly on the ceiling.
If you need help tying a balloon, check out my post How To Tie A Balloon.

4. Attach Ribbon (Optional)
This is an optional step and will depend on what type of balloon ceiling you are going for. A balloon ceiling with ribbon will look very different than a balloon ceiling without ribbon. Check out my post How To Tie A Ribbon And Balloon At The Same Time.
If using a ribbon, don’t forget to curl the short side of the ribbon for a more finished and professional look.
Balloons on the ceiling without string. If you choose not to use a string, the balloons will lay against the ceiling however they choose. You will have less control over the way they look.
A ribbon helps weight the balloon so they sit with the nipple of the balloon on the ceiling rather than the side of the balloon.

5. Place Balloon
If possible I like to inflate the balloons for a balloon ceiling in the location I will be using so I can just let them go after inflation. This is not always the case or even possible.
If using Hi-Float, inflate the balloons and tie the balloons to a temporary location. A slip knot to a rail can keep them organized and up-right, allowing the Hi-Float to dry inside the balloon. After just a few minutes the Hi-Float will be dry and you can relocate the balloons to their point of use.
Allowing the Hi-Float to dry inside the balloon helps ensure the balloon will sit with the nipple of the balloon on the ceiling rather than the side of the balloon.
However, if you opt for no strings you need a place to put your inflated balloons if they need to be transported or aren’t ready to be released. Check out my post The Best Way To Transport Inflated Balloons.
6. Repeat
Repeat steps 3 – 5 until all the balloons are inflated.
7. Enjoy!
Steps To Make A Balloon Ceiling – Air Filled
- Gather All Of Your Ingredients
- Inflate Balloon & Tie
- Attach Ribbon (Optional)
- Place Balloon
- Repeat
- Enjoy!
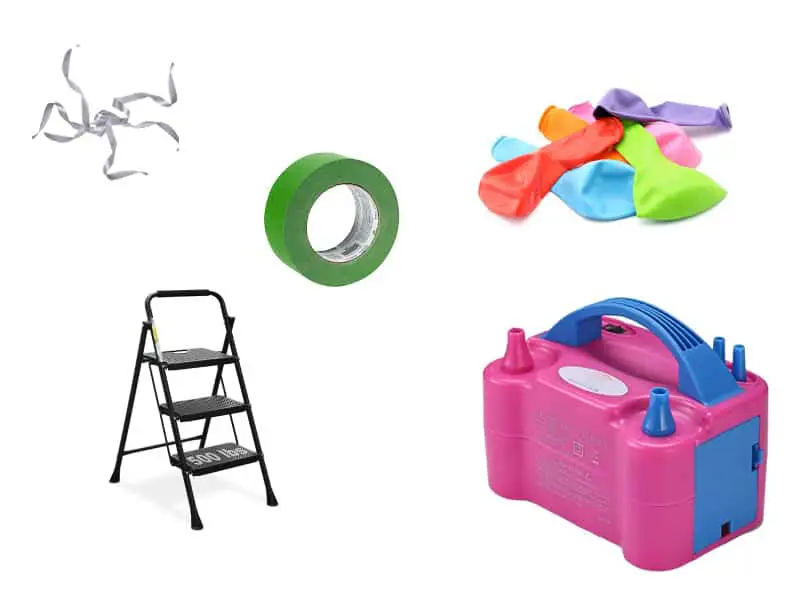
1. Gather All Of Your Ingredients
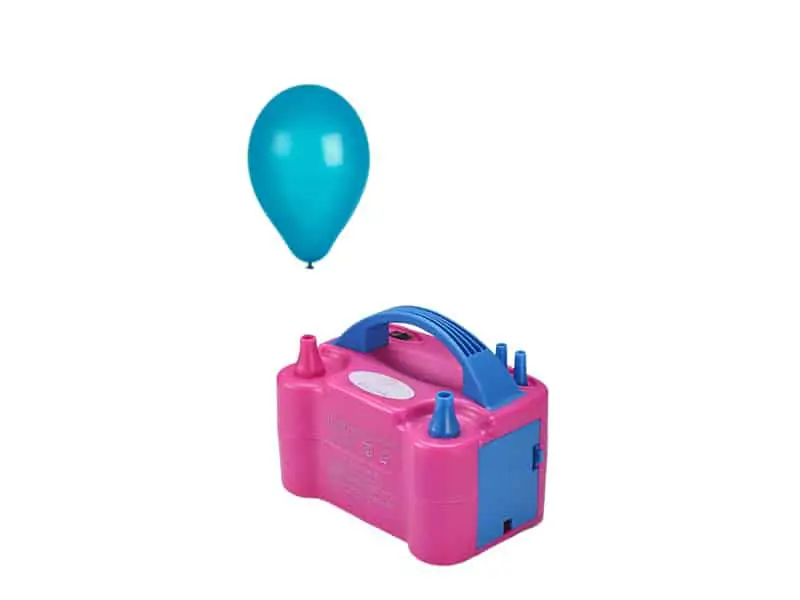
- Balloons
- Pump or balloon inflator
- Ribbon (Optional)
- *Adhesive (painters tape, glue dots)
- Step stool or full-sized ladder (depends on ceiling height)
*The exact adhesive type will depend on the ceiling type you are attaching to. In general, a good painter’s tape is an all-around good adhesive. You should test your adhesive to the particular ceiling before installation to determine successful adhesion without causing any damage.
2. Inflate Balloon & Tie
Using the balloon pump or balloon inflator, inflate the balloons with air. You may want to size your balloons when making a balloon ceiling. I like to use the eyeball method to size my balloons for a balloon ceiling. Check out my post 3 Ways To Size A Balloon here.
If you need help tying a balloon, check out my post How To Tie A Balloon.

3. Attach Ribbon (Optional)
This is an optional step and will depend on what type of balloon ceiling you are going for. A balloon ceiling with ribbon will look very different than a balloon ceiling without ribbon. Check out my post How To Tie A Ribbon And Balloon At The Same Time.
If using a ribbon, don’t forget to curl the short side of the ribbon for a more finished and professional look.
Balloons on the ceiling without string.
4. Place Balloon
Place the balloons securely so they won’t get popped or damaged until you are ready to hang them. Check out my post The Best Way To Transport Inflated Balloons.
5. Repeat

6. Hang The Balloons
Using the step stool or ladder and adhesive, attach the balloon to the ceiling. You may want to attach the balloons to the ceiling so the balloons look like they are filled with helium or you might want to attach the balloon from the ceiling upside down.

7. Enjoy!
I hope this post brought value to your day. If it did, please consider sharing it with a friend or on your favorite social media. Thanks For Reading Fun With Balloons!