
This post contains affiliate links.

Have you ever seen those beautiful frames filled with balloons and wondered what they are? Those are called Mosaic Balloons. DIY Mosaic Balloons have become increasingly popular over the last several years (even though they have been around for many years) and they don’t show any signs of slowing down.
One reason mosaic balloons have become so popular in recent years is that people have found easier and easier ways to create their own mosaic balloons at home. This article is going to focus on three of the ways people have come up with easily creating their own mosaic balloons.
Check out some of my other posts about mosaic balloons like How To Make A Free Mosaic Balloon and All About Mosaic Balloon Kits: What They Are, Where To Get Them, And More.
What Is A Mosaic Balloon
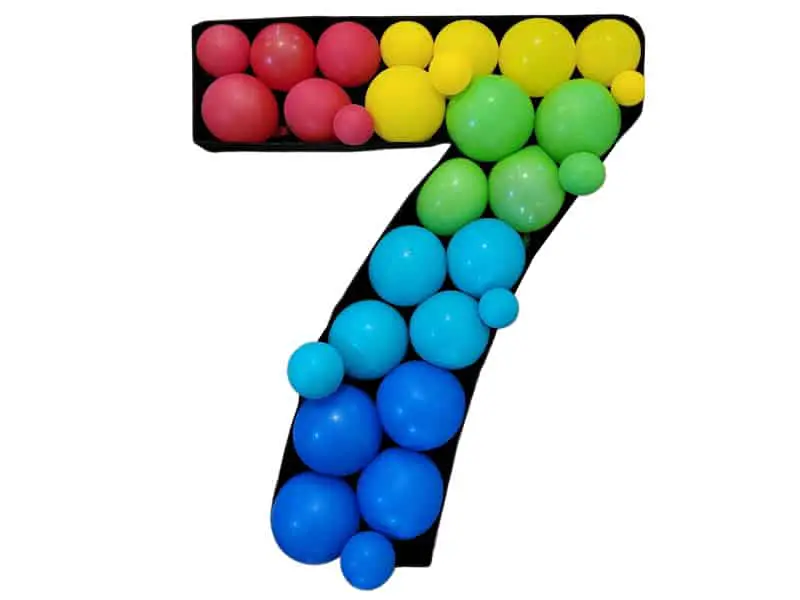
A mosaic balloon is a three dimensional letter, number, or shape filled with balloons in a mosaic fashion. Mosaic balloons can be a great way to highlight a specific name or number for an event. Mosaic balloons are fully customizable so they are the perfect addition to any balloon decorations.
Three Ways To Make A Mosaic Balloon
There are three main ways of making a mosaic balloon without using a kit. The three main ways to make a mosaic balloon are the freehand method, the projector method, and the print method. Each method has its pros and cons. Check out the table below to determine which method is right for you and your specific situation.
| Type | Notes |
| Freehand Method | This method will require a bit of skill. |
| Projector Method | This method will require a projector. |
| Print Method | This method will require access to a printer. |
Steps To Make A DIY Mosaic Balloon
What You Will Need:
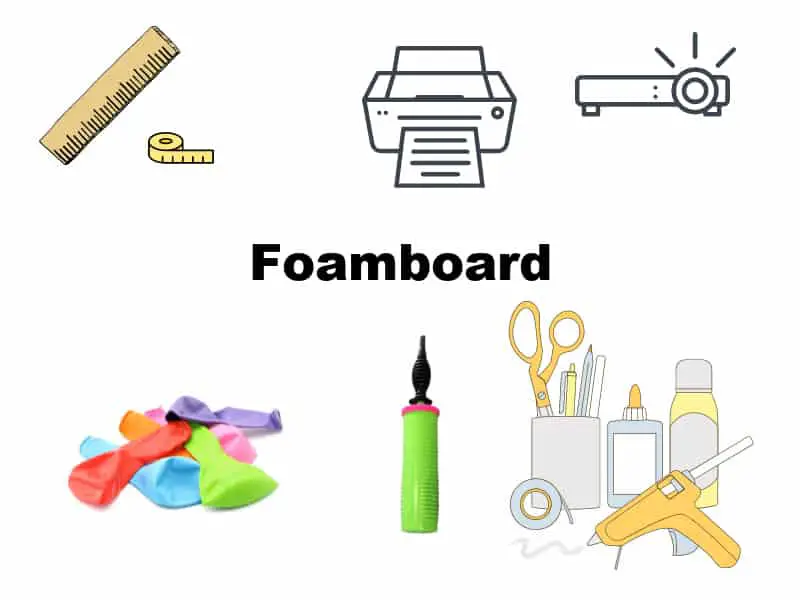
- Tape (In this example I used blue painters tape so you could see it better but most types of tape will work)
- Scissors
- Foamboard
- Pen / Pencil
- Exacto Knife
- Ruler / Measuring Tape (Optional)
- Glue (glue gun, craft glue, Elmer’s glue, whatever you have)
- Balloons
- Hand Pump
- Projector/Printer (for appropriate method)
Draw The Desired Number, Letter, Or Shape (Freehand Method)
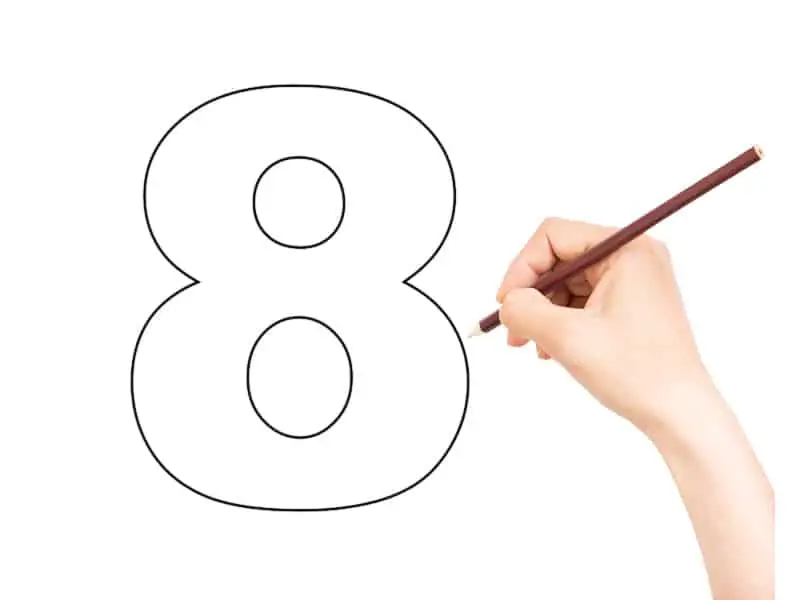
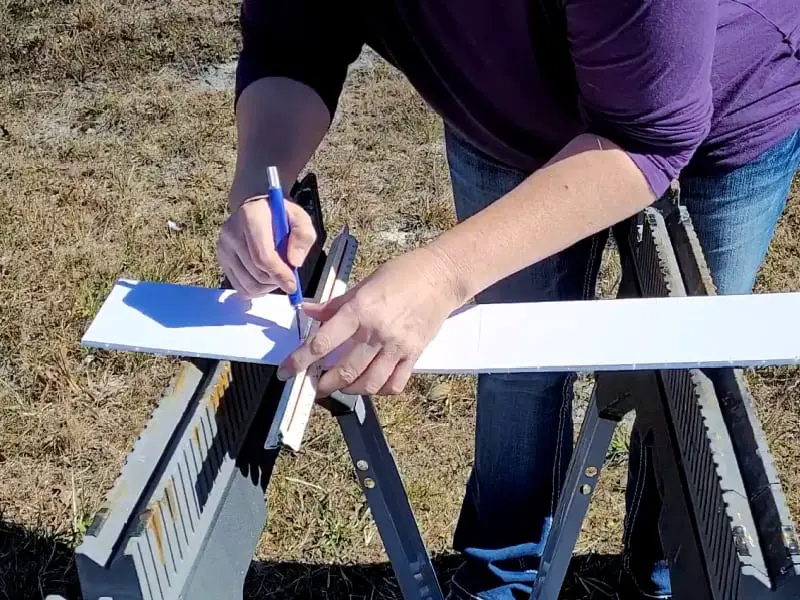
Using the pen/pencil, freehand the desired number, letter, or shape on the foam board.
Project Image on Wall (Projector Method)
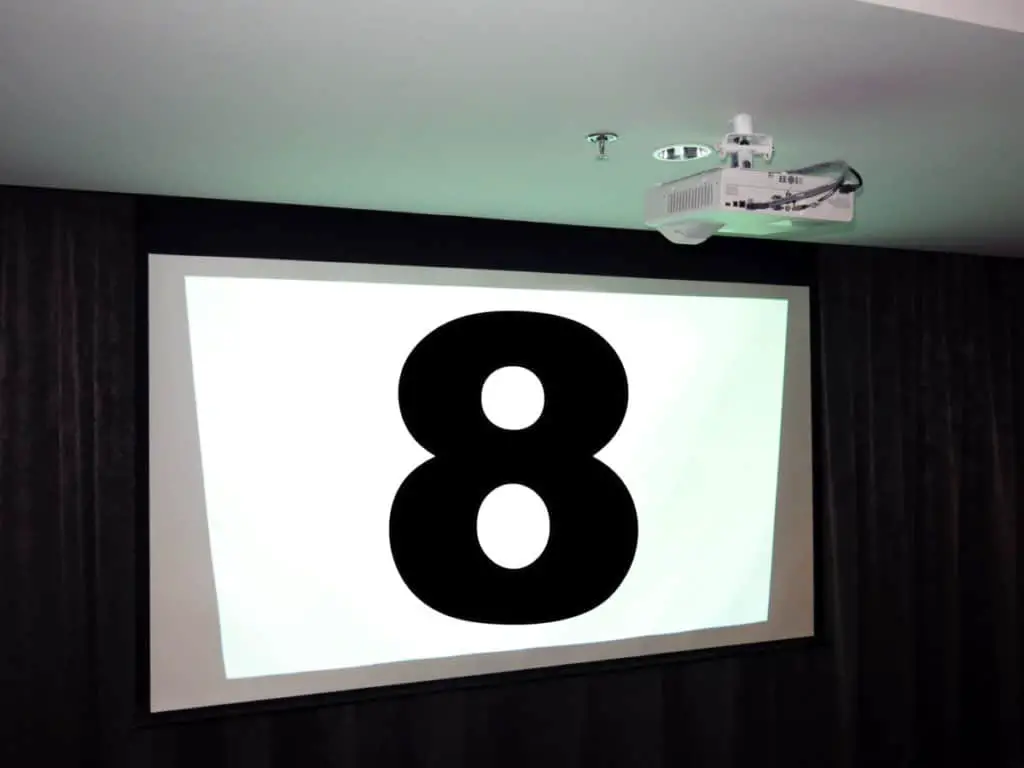
Using the projector, project the image to the desired size on a wall. Place the foam board on the wall where the image is and trace the image on the foam board.
Print, Cut, And Assemble Template (Print Method)
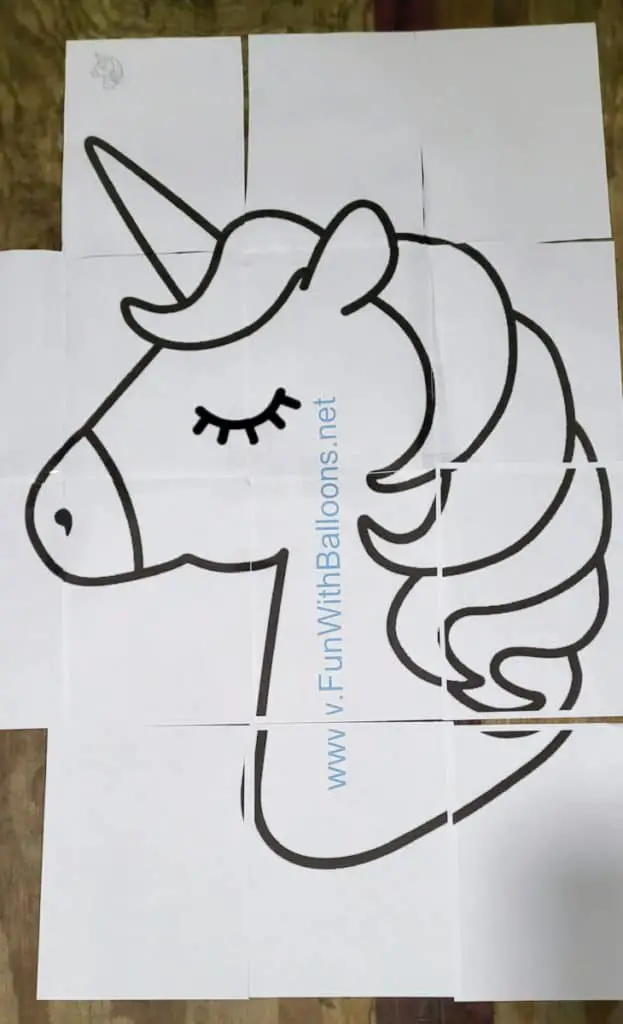
Print your mosaic balloon template. There are several different places you can get free or for a minimal fee, templates for mosaic balloons. Check out my Mosaic Balloon templates; Mosaic Balloon Letters, Mosaic Balloon Numbers, Mosaic Balloon Punctuations, and Mosaic Balloon Shapes.
Trim edges (optional). Layout the picture. Tape images together. Cut out around the image.
Trace Image On Foamboard (Print Method)
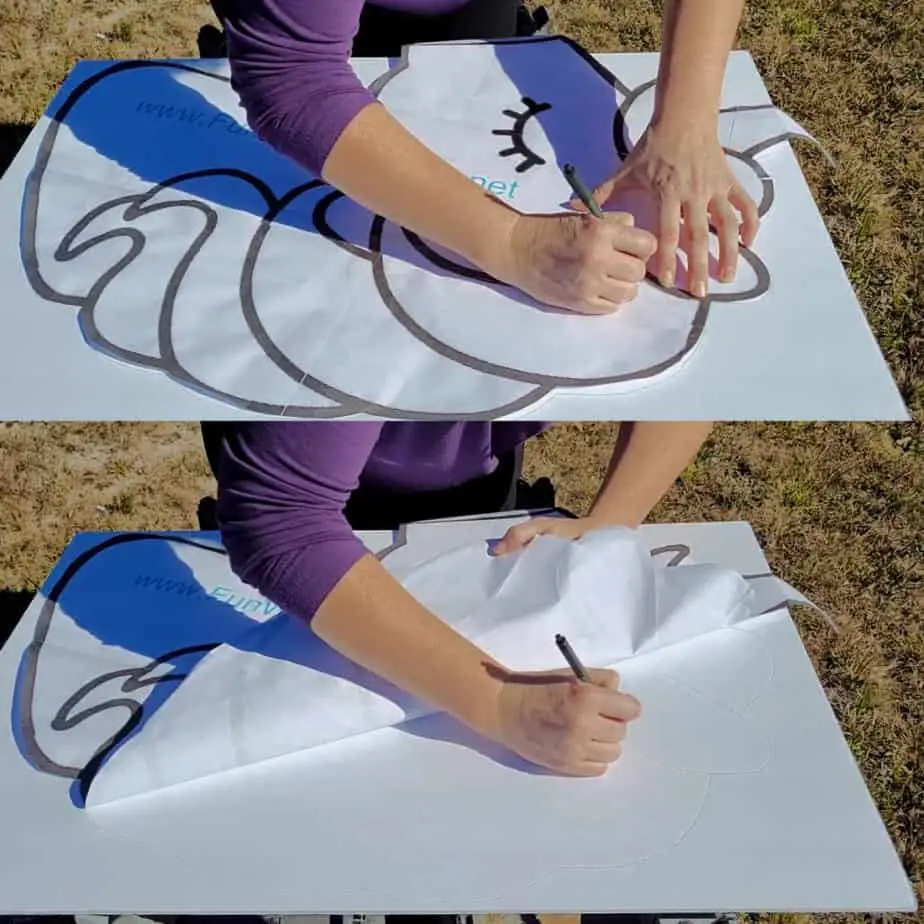
Using your pen or pencil trace the image out on your foam board.
For interior lines, trace over the printed lines, this will cause a slight indent on the foam board. Next, lift the paper template and use the slight indent as a guide to drawing the line.
If your image doesn’t fit completely on the foamboard, fold the image over where it meets the edge. Then place the folded edge on a new foamboard piece and continue tracing.
Cut Foamboard Shape(s) (All Methods)
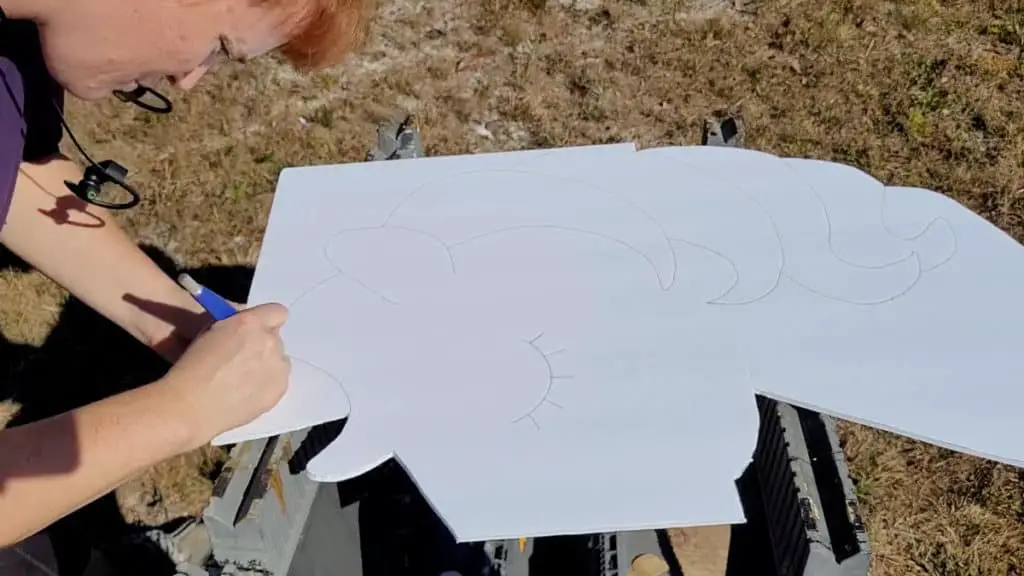
Using the exact knife gently cut out the image(s) from the foam board.
If the image didn’t fit as one piece, gently tape the additional pieces (front and back) to the main foamboard shape.
The rest of the steps from here on out will be for all three methods.
Cut FoamBoard Sides
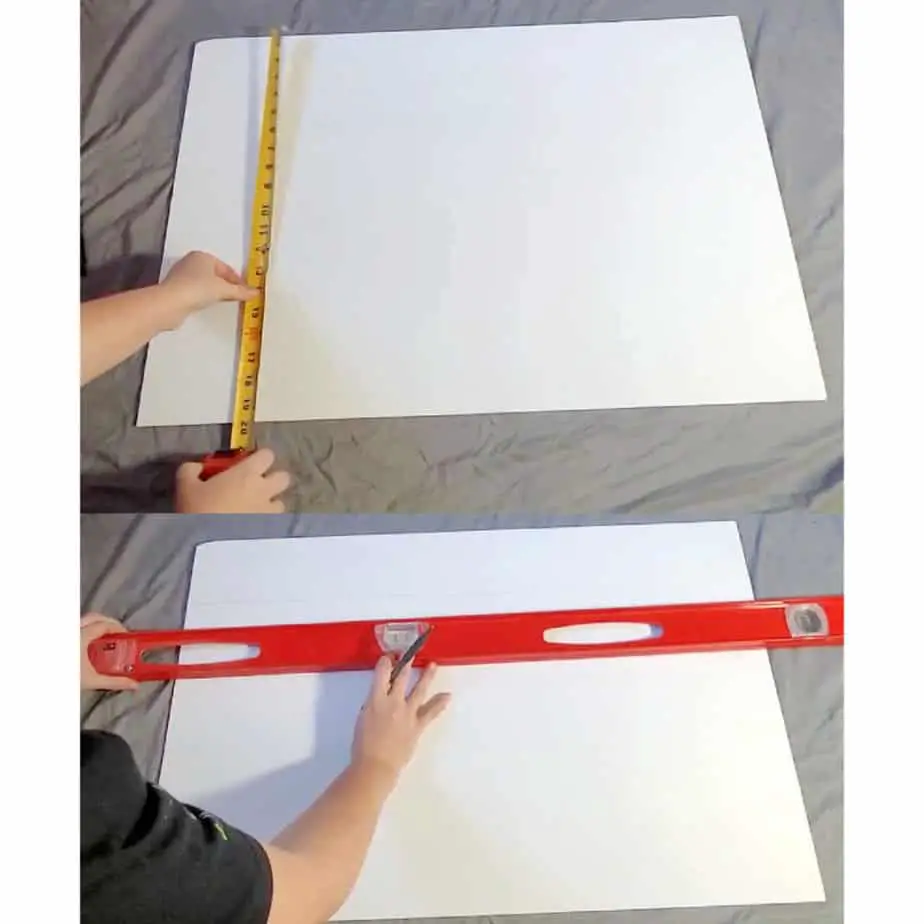
Cut strips of foam board 3″ – 6″ thick depending on your desired Balloon Mosaic size.
For a smaller Mosaic Balloon use smaller sides, for a larger Mosaic Balloon use larger sides. It is a personal preference, depending on the look you are going for with your mosaic balloon and the size of balloons you are using. If you are using smaller balloons you might want to use smaller sides and if you are using larger balloons you might want to use bigger sides.
Score Foamboard Sides As Needed
Scoring is where you make little cuts in the foamboard not penetrating through the whole board so as to completely cut the foamboard.
For big wide curves, a 1″ score is good. For tight curves, a smaller 1/2″ score is necessary.
Wrap Main Foamboard Shape With Foamboard Sides
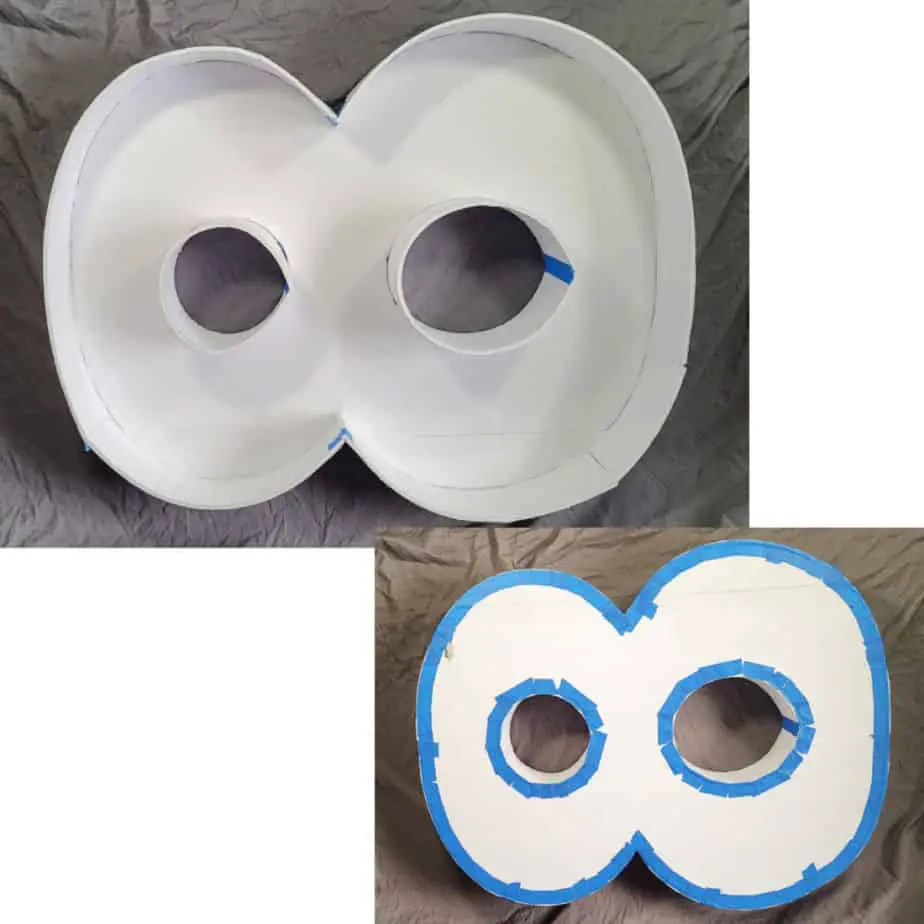
Start with the innermost parts. For example, if you are doing a number 8, start with the 2 holes on the inside.
Secure the sides using tape. This will help hold it in place for the next step. Make sure that as you are taping the sides in place you aren’t placing the tape where it will show unless you plan on removing the tape or painting the tape, which is an optional step.
Glue Foamboard Sides Onto Main Foamboard Shape
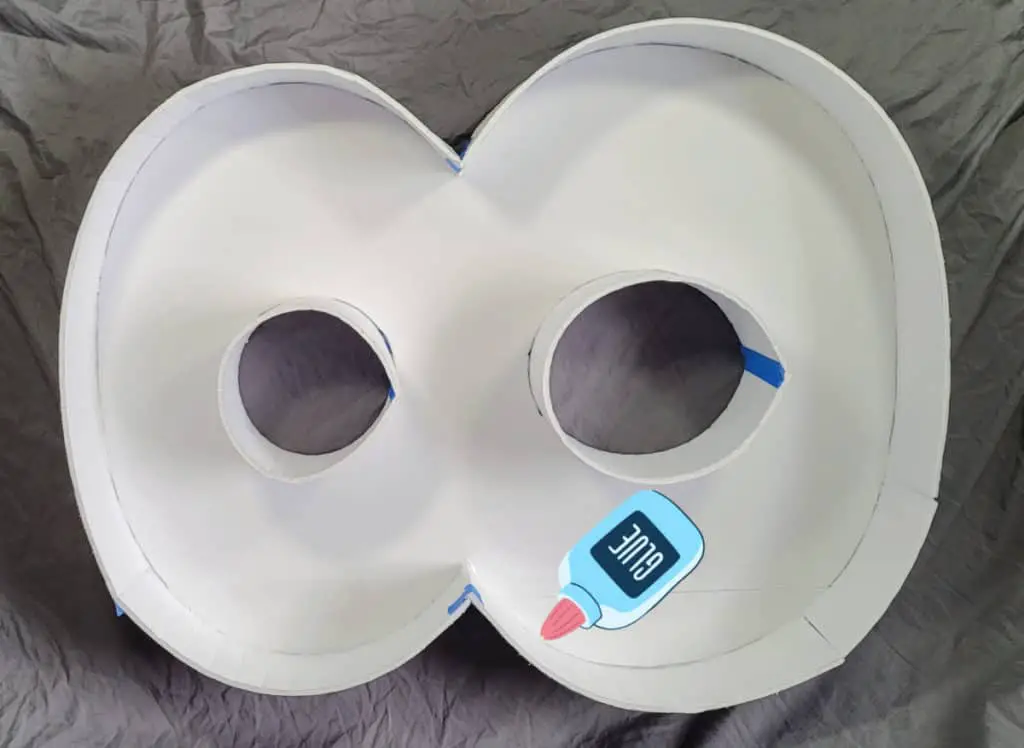
Secure the sides of the mosaic balloon with glue.
Make sure the mosaic balloon is fully dry before moving on to the next step.
Remove Tape (Optional)
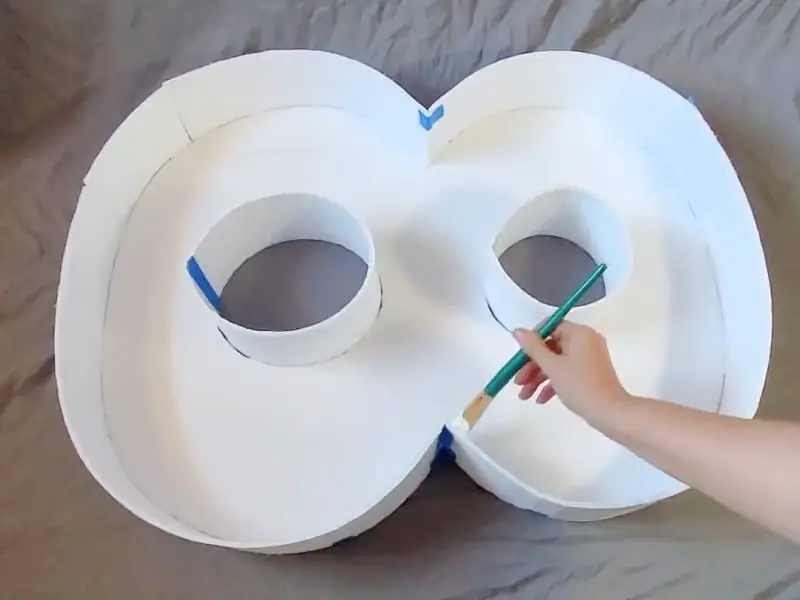
You may want to remove some or all of the tape from previous steps. I only remove the tape if it can be seen from the front of the mosaic balloon. Otherwise, I just leave it be.
If I used painter’s tape, like in this example, I will sometimes just paint the tape white instead of removing the tape.
Fill With Balloons (Optional)

This is an optional step. You can fill your mosaic with balloons. I am working on a post, How To Fill A Mosaic With Balloons, I will link it when it is finished. Or you could put lights in the mosaic and make it a marquee. I am also working on a post Marquee Numbers and I will link it here when it is finished.
Cut Out Inner Detail (Optional)

This step is if your image has inner detail, as in the example of the unicorn it would be the eye and nostril. Cut out the inner detail and glue or tape in the appropriate location.
Enjoy!
Three Ways To Make A Mosaic Balloon Video (ComingSoon)
Some other posts you might be interested in are How Long Do Balloons Last: All About Inflating Balloons Early, Balloons And Boos: It’s Spooky Season! – Halloween Balloon Decorations And Ideas, Creating Personalized Events: The Art of Using Life-Sized Cardboard Cutouts, and How To Price Balloons For Profit.
I hope this post brought value to your day. If it did, please consider sharing it with a friend or on your favorite social media. Thanks For Reading Fun With Balloons!